Just as a reminder, I shall say once again that i do these DIY’s for fun and it is absolutely subjective if they turn out beautiful or not.
Autumn has really gotten into me and I am looking to update things around the house. However, I have to do it with a super low budget. That’s why I was looking around Pinterest, for DIYs to spice up some of my mugs when I found these! They looked beautiful, I was excited, they seemed so easy!
So I gathered my materials and I was ready to go.

MATERIALS :
- nail polish
- white mug
- container for water
- stick to stir (optional)
- clean cloth (you will need that to wipe something for sure)
- nail remover and cotton (you can use that later don’t worry)
So STEP ONE is to pour warm water into your container and add a few drops of nail polish. So I did.

I was planning to go black and white but my black nail polish was a bit thin and the mess started somewhere aroung that.
STEP TWO is to take your mug and dip it into the water. If you are aiming for the original model and I mean my inspiration, these , you dip part of your mug into the water. For me it was something like that:

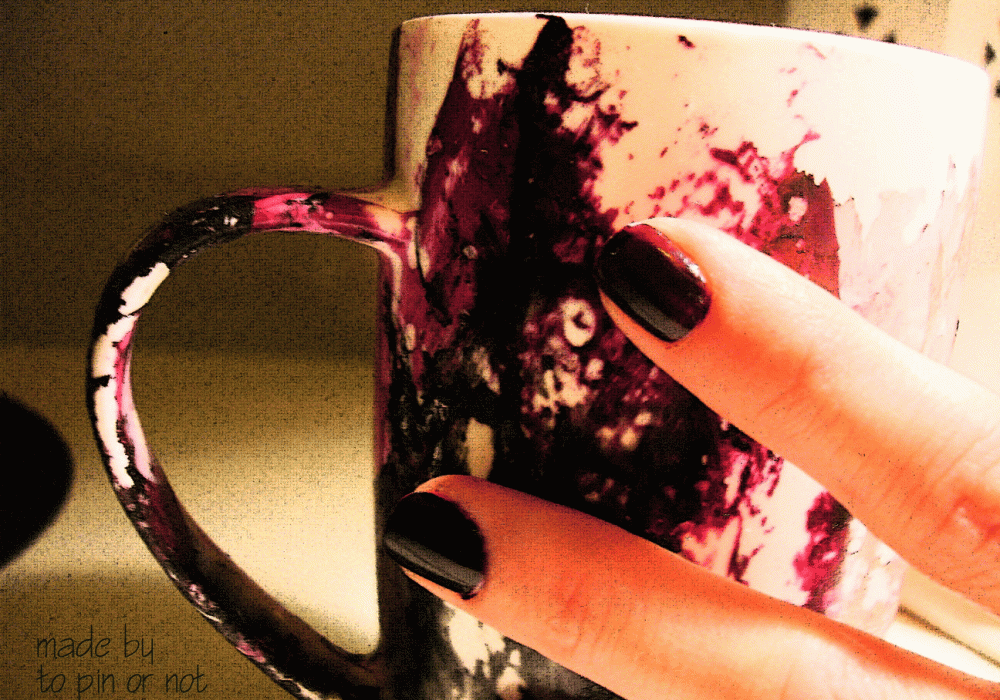
It doesn’t look that good does it? I don’t know why but the nail polish creates a film that does not really come off as watercolorish as I would expect.
STEP THREE is to either pat it dry carefully with a clean cloth, or use more colors and dip again. Since mine was not coming out all that great I decided to mix the colors and dip the whole mug inside the water. I was dipping and then patting and dipping and patting until something artistic came out (at least it looked artistic to me).
My hands where dirty, my ego was a little bit hurt, but I decided that something different had come out and the more I looked at it the more I liked it. So I decided to play with another mug as well. P. should have one too (LOL).


STEP FOUR : let it dry for about 4 hours.
STEP FIVE : clean the insides with nail remover. That step could also be done earlier when you are still playing with colors
STEP SIX : wash them and they are perfectly fine. The nail polish did not come out as I was afraid it would.
STEP SEVEN : cut two pieces of cake pour some coffee for you and your company and there you go.


Maybe the DIY didn’ t go as planned, but i believe that something equally interesting came up. And after all i can at least say “I made these” and feel good about it!

*Don’t forget when you finish all the diying to polish your nails OF COURSE!

